If you’ve ever wandered through Disneyland’s magical pathways, the memory of sweet aromas drifting from the bakeries probably still lingers with you. Among the park’s many treats, one stood out for generations of visitors: Disneyland’s Peanut Butter Sandwich Bars. With their velvety peanut butter filling, crunchy graham cracker layers, and silky chocolate topping, these bars became a fan favorite. Though they’ve disappeared from the official menu, fans around the world have kept their legacy alive through copycat recipes.
This article is your ultimate, detailed guide to recreating Disneyland’s Peanut Butter Sandwich Bars at home. It goes far beyond the average recipe: we’ll explore their history, the science behind each ingredient, step-by-step instructions, pro tips, storage methods, healthy variations, serving ideas, FAQs, and much more. By the time you finish reading, you’ll not only be able to make them perfectly but also customize them to suit your taste, dietary needs, or party themes.
What Makes Disneyland’s Peanut Butter Sandwich Bars Special?
Disneyland’s peanut butter bars weren’t just another dessert. They were a fusion of comfort and creativity—the kind of snack that felt homemade yet magical. Here’s what makes them stand out:
- No-Bake Simplicity – They don’t require an oven, making them beginner-friendly and quick.
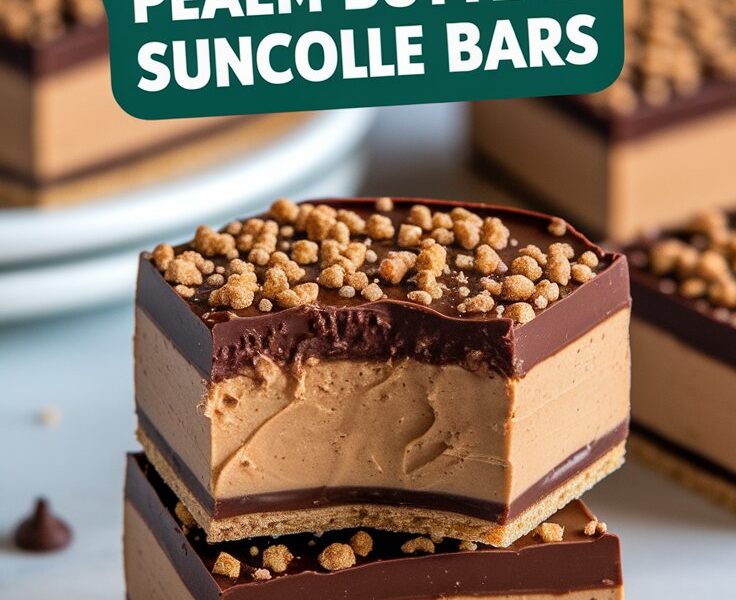
- Balanced Textures – A base of crisp graham crackers, a creamy peanut butter filling, and a glossy chocolate topping deliver layers of crunch, softness, and richness.
- Universal Appeal – Chocolate and peanut butter is a flavor combination loved across all ages.
- Nostalgia Factor – For many, they’re a reminder of childhood trips to Disneyland, making them more than just a dessert.
This unique blend of ease, flavor, and memory is what has kept the recipe alive long after it vanished from the park menu.
A Brief History: The Magic Behind the Bars
Disneyland has always been more than rides—it’s a world built around experience and memory-making, and food plays a huge role in that. The Peanut Butter Sandwich Bars were once available at Pooh Corner in Critter Country and other bakery counters. Guests loved them because they were portable, affordable, and indulgent.
While Disney hasn’t shared the official recipe, passionate fans and food bloggers have worked tirelessly to reverse-engineer the treat. Today, countless variations exist, but the core concept remains the same:
- Layer of graham crackers
- Peanut butter and sugar filling
- Chocolate-peanut butter topping
The beauty of this dessert is its versatility—every home baker can tweak it to their taste while still enjoying that classic Disney nostalgia.
Ingredients for Disneyland’s Peanut Butter Sandwich Bars
This recipe makes around 12–16 bars depending on how you slice them.
Base and Filling
- 1 sleeve graham crackers (about 9 whole crackers), plus extra for layering
- 1 cup creamy peanut butter
- ½ cup unsalted butter, melted
- 1½ cups powdered sugar (sifted for smoothness)
- 1 teaspoon vanilla extract
- ¼ teaspoon salt
Chocolate Topping
- 1½ cups semi-sweet chocolate chips
- 2 tablespoons peanut butter (for a softer set and smoother cut)
Substitutions and Alternatives
- Nut-free version – Use sunflower seed butter or cookie butter instead of peanut butter.
- Gluten-free – Swap regular graham crackers for gluten-free ones.
- Dairy-free – Replace butter with coconut oil or vegan margarine.
- Lower sugar – Use powdered monk fruit sweetener in place of sugar.
- Different chocolates – Try dark chocolate for a richer bite or white chocolate for a sweet twist.
Tools and Equipment You’ll Need
The best part about this recipe is its simplicity—no fancy equipment required. Here’s all you need:
- 8×8 or 9×9-inch square baking pan
- Parchment paper (for easy lifting and slicing)
- Mixing bowls
- Microwave-safe bowl or double boiler (for melting chocolate)
- Measuring cups and spoons
- Spatula and offset spatula (for spreading evenly)
- Sharp knife (for clean cuts)
Step-by-Step Instructions
Step 1: Prepare the Pan
Line your baking pan with parchment paper, leaving some overhang for easy lifting later. This prevents sticking and makes slicing cleaner.
Step 2: Create the Graham Cracker Base
Place whole graham crackers in a single layer on the bottom of the pan. Break pieces as needed to cover the surface completely.
Step 3: Make the Peanut Butter Filling
In a medium bowl, stir together melted butter, peanut butter, powdered sugar, vanilla, and salt until smooth and thick. This mixture should be spreadable but firm.
Step 4: Spread the Filling
Evenly distribute the peanut butter mixture over the graham cracker base using a spatula. Smooth the top for an even layer.
Step 5: Add the Top Layer of Graham Crackers
Place another layer of whole graham crackers over the filling, pressing gently to help them stick.
Step 6: Melt the Chocolate
In a microwave-safe bowl, heat chocolate chips and 2 tablespoons peanut butter in 30-second bursts, stirring between each, until smooth and glossy.
Step 7: Pour and Spread the Chocolate Topping
Spread the melted chocolate mixture over the graham cracker layer. Smooth it with an offset spatula.
Step 8: Chill Until Set
Refrigerate for at least 1–2 hours, or until the chocolate is firm.
Step 9: Slice and Serve
Lift the bars out of the pan using the parchment paper. Slice into squares or rectangles with a sharp knife. Serve chilled or at room temperature.
Secrets to Getting Perfect Peanut Butter Bars
- Sift powdered sugar for a lump-free filling.
- Don’t skip the salt—it balances the sweetness.
- Chill thoroughly before cutting to avoid messy edges.
- Use creamy peanut butter for smoother results (natural peanut butter may require extra chilling).
- Cut with a warm knife (dip in hot water, wipe dry) for neat slices.
Fun Variations to Try
- Peanut Butter Pie Bars – Use crushed graham crackers mixed with butter as a crust instead of whole crackers.
- Crunchy Version – Use chunky peanut butter or add chopped peanuts.
- S’mores Twist – Spread marshmallow fluff between the peanut butter and chocolate layers.
- White Chocolate Delight – Replace semi-sweet chocolate with white chocolate for a sweeter finish.
- Healthier Version – Use dark chocolate, natural peanut butter, and reduce sugar for a guilt-free treat.
Serving Suggestions
- Cut into bite-sized squares for party platters.
- Pair with a cold glass of milk for a nostalgic snack.
- Serve with vanilla ice cream for an indulgent dessert.
- Drizzle with caramel or dust with cocoa powder for a café-style finish.
- Wrap individually for lunchbox treats or holiday gifts.
Storage and Freezing Guide
Refrigeration
- Store in an airtight container in the fridge for up to 1 week.
- Place parchment paper between layers to prevent sticking.
Freezing
- Freeze bars in a container with parchment between layers for up to 2 months.
- Thaw in the fridge or at room temperature before serving.
Pro tip: These bars taste amazing cold, so try serving straight from the fridge.
Nutrition Facts (Per Serving, Based on 16 Bars)
- Calories: ~280
- Fat: 19 g
- Saturated Fat: 8 g
- Carbohydrates: 23 g
- Sugar: 17 g
- Protein: 5 g
- Sodium: 140 mg
- Fiber: 2 g
Note: This is an estimate and will vary depending on brands used.
Make-Ahead Tips for Parties and Busy Weeks
- Prepare a day in advance and refrigerate overnight for easier slicing.
- Double the recipe for a 9×13-inch pan when feeding a crowd.
- Wrap bars individually for grab-and-go snacks.
- Add them to dessert boards for birthdays, holidays, or bake sales.
Frequently Asked Questions
1. Can I make these nut-free?
Yes! Use sunflower seed butter or cookie butter as a substitute.
2. Can I use natural peanut butter?
Yes, but the filling will be softer. Chill longer and adjust powdered sugar as needed.
3. Can I make them gluten-free?
Absolutely—just use gluten-free graham crackers.
4. How do I prevent the chocolate from cracking when cutting?
Let bars sit at room temperature for 10 minutes before slicing, or cut with a warm knife.
5. Do I need an electric mixer?
No, a simple spatula works since this is a no-bake recipe.
Why These Bars Are Worth Making
Disneyland’s Peanut Butter Sandwich Bars aren’t just a dessert—they’re a way to recreate cherished memories and share them with family and friends. They’re budget-friendly, quick to prepare, freezer-friendly, and endlessly customizable. Whether you’re planning a party, surprising your kids, or simply craving something sweet, these bars deliver every time.
Final Thoughts
In a world full of complicated desserts, Disneyland’s Peanut Butter Sandwich Bars shine because of their simplicity, nostalgia, and universal appeal. They remind us that sometimes the best treats are made from everyday ingredients, layered with love, and enjoyed with the people who matter most.
Try making them this weekend—you’ll discover why they’ve remained legendary long after leaving Disneyland’s menus. Share them with friends, pin this recipe for later, and keep the magic alive in your own kitchen.