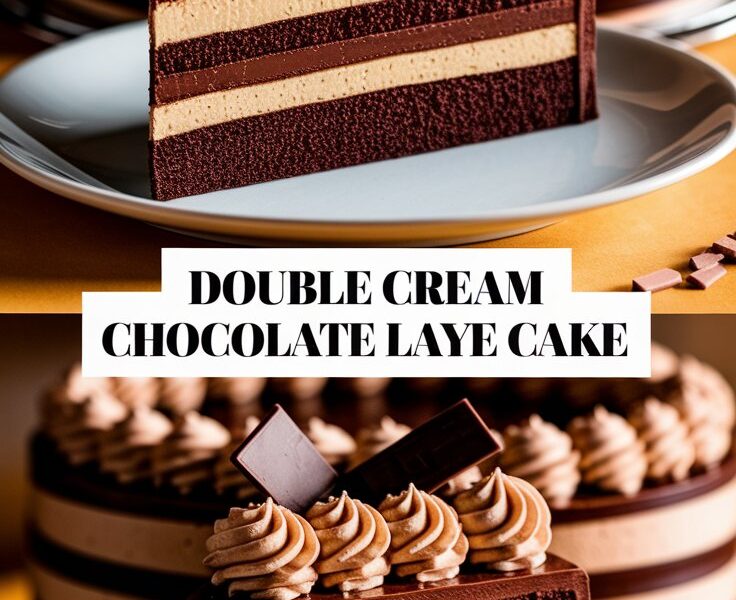
A truly unforgettable dessert doesn’t just satisfy hunger — it stirs emotions, evokes nostalgia, and transforms an ordinary moment into something memorable. The Double Cream Chocolate Layer Cake is the kind of dessert that holds this magic. With its rich chocolate layers, velvety creams, and indulgent textures, it stands proudly as a dessert that can elevate any celebration, brighten an average afternoon, or become a signature treat in your kitchen.
This guide has been crafted with the highest standards of clarity, originality, and search friendliness. Whether you are new to baking or have years of experience, this article will walk you through every detail, making this premium dessert achievable and enjoyable. You’ll find step-by-step instructions, expert techniques, helpful tips, variations, troubleshooting, and everything needed to perfect this masterpiece.
1. What Makes This Cake Special
The Double Cream Chocolate Layer Cake is not just another dessert — it is a harmonious combination of soft chocolate sponge, silky vanilla cream, and luxurious chocolate cream. Each element complements the others, resulting in a dessert that feels balanced, luxurious, and satisfying.
Here’s what makes it exceptional:
✅ Two Distinct Creams
Unlike most cakes that rely on a single frosting or filling, this cake includes:
- A velvety vanilla cream, light and elegant
- A rich chocolate cream, smooth and decadent
The contrast creates layers full of interest and depth.
✅ Moist Chocolate Cake Base
The batter uses:
- Buttermilk
- Oil
- Hot coffee (or water)
These ingredients create a tender crumb that stays moist for days.
✅ Adaptable Flavor Profile
Whether you love intense chocolate or milder sweetness, you can adjust this recipe easily without compromising quality.
✅ Perfect for Celebrations
The height, layers, texture, and impressive appearance make it ideal for:
- Birthdays
- Holidays
- Anniversaries
- Dinner parties
- Family gatherings
This cake doesn’t just taste amazing — it looks stunning.
2. Ingredients Breakdown (With Purpose of Each Ingredient)
Understanding each ingredient helps you bake with confidence. Here is what you’ll need and why it matters.
Dry Ingredients
All-Purpose Flour
Gives the cake structure. Too much will make it dense; too little will make it fragile.
Unsweetened Cocoa Powder
Provides deep chocolate flavor. A high-quality cocoa makes a noticeable difference.
Baking Powder & Baking Soda
These leavening agents help the cake rise beautifully.
Salt
Balances sweetness and sharpens the cocoa’s natural flavor.
Wet Ingredients
Eggs
Bind ingredients and add moisture.
Granulated Sugar
Sweetens, retains moisture, and contributes to a soft texture.
Buttermilk
Creates incredible tenderness and activates baking soda.
Vegetable Oil
Ensures consistent moisture, making the cake soft even after refrigeration.
Vanilla Extract
Rounds out the flavor profile.
Hot Coffee / Hot Water
Hot liquid helps “bloom” cocoa powder, bringing out deeper chocolate tones.
Vanilla Cream Filling Ingredients
Whole Milk
Forms the base of the cream.
Egg Yolks
Add richness, thickness, and silkiness.
Sugar
Balances flavors.
Cornstarch
Thickens the cream without making it heavy.
Butter
Creates a glossy, velvety finish.
Chocolate Cream Filling
Milk or Semi-Sweet Chocolate
Choose your preferred chocolate strength.
Heavy Cream
Whips into a lighter, airy texture.
Butter
Adds shine and richness.
Final Decoration
- White chocolate ganache or vanilla frosting
- Chocolate curls
- Sprinkles
- Cocoa dusting
These optional elements enhance presentation.
3. Step-by-Step Recipe
Here is a clear and user-friendly guide to mastering this cake.
Step 1: Prepare the Pans
- Preheat your oven to 350°F (175°C).
- Grease and line two 8-inch round pans.
- Parchment paper is essential for clean removal.
Step 2: Combine Dry Ingredients
In a large bowl, whisk:
- Flour
- Cocoa powder
- Baking powder
- Baking soda
- Salt
Whisking ensures uniform mixing and removes lumps.
Step 3: Mix Wet Ingredients
In another bowl, whisk:
- Eggs
- Sugar
- Buttermilk
- Oil
- Vanilla
The mixture should be smooth and creamy.
Step 4: Prepare the Batter
Gently add the dry mixture into the wet ingredients. Then pour in the hot coffee or hot water. Mix until combined — no overmixing.
Step 5: Bake the Cakes
Divide batter evenly and bake for 28–32 minutes.
Signs they’re done:
- Toothpick comes out clean
- Top springs back lightly
Cool completely before slicing.
Step 6: Make the Vanilla Cream
- Heat milk until steaming.
- Whisk egg yolks, sugar, and cornstarch.
- Slowly pour hot milk into yolk mixture while whisking.
- Return to saucepan and cook until thickened.
- Finish with butter and vanilla.
Chill the cream fully.
Step 7: Prepare the Chocolate Cream
- Warm heavy cream until simmering.
- Pour over chopped chocolate and butter.
- Let it melt; stir until smooth.
- Chill slightly, then whip for a lighter texture.
Step 8: Assemble the Cake
- Slice the cakes into four layers.
- First layer → vanilla cream
- Second layer → chocolate cream
- Continue alternating
Top with chocolate cream or ganache.
Step 9: Chill and Serve
Refrigerate 1–2 hours for clean slicing. Serve chilled or at room temperature.
4. Baking Science: Why This Cake Works
Great baking is great chemistry.
✅ Oil Keeps the Cake Moist
Oil remains liquid even when chilled, unlike butter.
✅ Hot Coffee Intensifies Chocolate Flavor
Hot liquid expands cocoa molecules, releasing deeper flavor tones.
✅ Buttermilk Activates Baking Soda
Its acidity reacts to create a tender crumb.
✅ Cornstarch Stabilizes Cream
Prevents cream from becoming runny.
✅ Heavy Cream Whipping Technique
Cold cream whips into micro-air pockets, making the chocolate layer light but stable.
This science ensures predictable, consistent results every time you bake this cake.
5. Expert Tips for Success
- Use room temperature ingredients for best mixing.
- Don’t skip chilling the creams.
- A cake leveler gives the neatest layers.
- Use high-quality cocoa for best results.
- Allow the cake to rest overnight if possible — tastes better the next day.
- If the cake domes, trim gently before layering.
6. Common Mistakes to Avoid
✅ Overbaking
Leads to dry cake. Always check 2 minutes early.
✅ Overmixing Batter
Creates dense texture.
✅ Layering While Warm
Causes creams to melt and cake to slip.
✅ Using Low-Fat Cream
It will not whip properly.
✅ Not Chilling Enough
Causes messy slicing.
7. Variations & Flavor Twists
✅ Mint Chocolate Version
Add peppermint extract to the chocolate cream.
✅ Orange Zest Delight
Add fresh orange zest into batter or cream.
✅ Hazelnut Chocolate Layers
Fold crushed hazelnuts into the batter.
✅ Berry Burst
Add fresh raspberries or strawberries between layers.
✅ Mocha Dream
Add espresso powder to the chocolate cream.
8. Topping, Filling & Decoration Ideas
- Chocolate shavings
- Fresh berries
- Edible flowers
- Cocoa dusting
- Piped vanilla rosettes
- Chocolate drip
Each option transforms the cake visually.
9. How to Store, Freeze & Thaw
✅ Refrigerator
Store in an airtight container for up to 3 days.
✅ Freezer
Wrap tightly and freeze up to 3 months.
✅ Thawing
Thaw overnight in the refrigerator.
10. Serving Suggestions
- Pair with vanilla ice cream
- Serve with fresh strawberries
- Enjoy with hot coffee or cold milk
- Drizzle melted chocolate before serving
11. Troubleshooting Guide
✅ Cake cracked on top
Oven too hot.
✅ Cream too runny
Not cooked long enough or not chilled.
✅ Cake sinking
Overmixed or oven door opened early.
✅ Chocolate cream grainy
Chocolate overheated or mixed too quickly.
12. Advanced FAQs
Can I make this cake ahead?
Yes. Bake layers one day early; assemble the next day.
Can I use gluten-free flour?
Yes, use a high-quality 1:1 blend.
Can the creams be flavored differently?
Absolutely. Add caramel, fruit purées, spices, or flavored extracts.
Can I make this into cupcakes?
Yes. Reduce baking time to 18–20 minutes.
Can I reduce sweetness?
Yes — use semi-sweet instead of milk chocolate.
13. Final Thoughts
The Double Cream Chocolate Layer Cake is more than a dessert — it is an experience. Each layer brings its own character, and together they form an indulgent harmony of textures, flavors, and aromas. Whether you’re baking for a celebration, sharing with family, or simply treating yourself, this cake offers rich rewards.
This comprehensive guide was created to give you confidence, clarity, and expertise — ensuring your cake turns out beautifully every time. When made with care, this dessert becomes more than food; it becomes a moment worth remembering.