When a dessert combines fudgy brownies, velvety cheesecake, and sweet-tart cherries in one bite, you know you’ve found something extraordinary. These Cherry Chocolate Brownie Cheesecake Bars aren’t just another dessert—they’re a masterpiece of flavors and textures designed to impress at any occasion.
Whether you’re baking for a cozy family night, a festive holiday gathering, or simply to satisfy your sweet tooth, this recipe delivers a bakery-quality treat without complicated steps or expensive ingredients. The result? A dessert bar that is rich yet balanced, indulgent yet elegant, and always a conversation starter.
In this comprehensive guide, you’ll discover everything you need to know to make these layered bars perfectly—every single time. From ingredient tips to step-by-step instructions, common mistakes to avoid, serving suggestions, and creative variations, this is your ultimate resource.
Why These Cherry Chocolate Brownie Cheesecake Bars Stand Out
So many desserts try to do it all, yet few achieve that perfect harmony of richness, creaminess, and brightness. Here’s why this recipe is a game-changer:
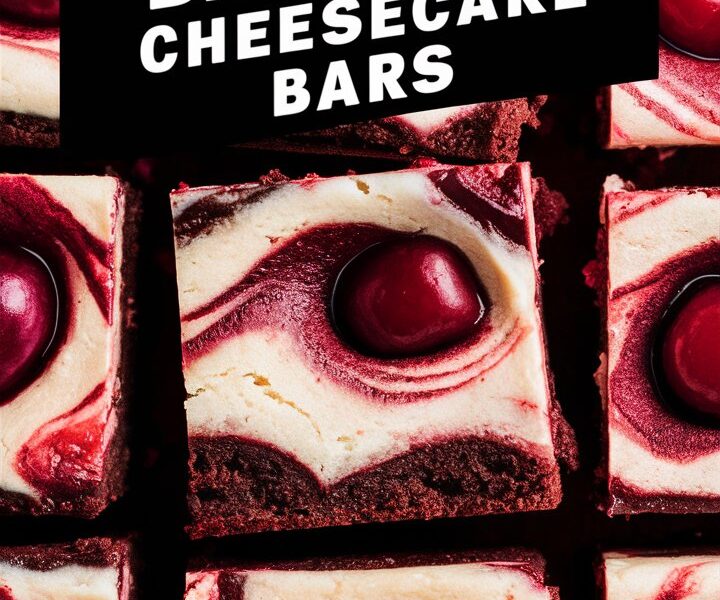
- Triple-layer perfection: Each bite combines a fudgy brownie base, a silky cheesecake center, and a fruity cherry topping.
- Beginner-friendly, professional results: No water bath, no complicated techniques—just straightforward steps with pro tips along the way.
- Uses common ingredients: Most of what you need is already in your pantry or freezer.
- Customizable: Works with fresh or frozen cherries, optional nuts, or even chocolate ganache.
- Perfect for any event: From potlucks to parties, these bars slice beautifully and store well.
Ingredients – What You’ll Need
Each ingredient plays a role in creating the ideal texture and flavor. Here’s what you need for each layer:
For the Brownie Layer
- 1/2 cup (1 stick) unsalted butter, melted – Gives richness and that classic brownie chewiness.
- 1 cup granulated sugar – Balances the bitterness of cocoa.
- 2 large eggs – Provide structure and moisture.
- 1 teaspoon vanilla extract – Enhances overall flavor.
- 1/3 cup unsweetened cocoa powder – The heart of the chocolate flavor.
- 1/2 cup all-purpose flour – Creates a firm but tender base.
- 1/4 teaspoon salt – Balances sweetness.
- 1/4 teaspoon baking powder – Adds a subtle lift without making it cakey.
For the Cheesecake Layer
- 8 oz (225 g) cream cheese, softened – For a smooth, creamy texture.
- 1/4 cup granulated sugar – Sweetens without overpowering.
- 1 large egg – Helps set the cheesecake layer.
- 1/2 teaspoon vanilla extract – Rounds out the flavor.
For the Cherry Layer
- 1 1/4 cups frozen cherries, thawed and roughly chopped – Fresh cherries can also be used in season.
- 2 tablespoons granulated sugar – Enhances the natural tartness.
- 1 tablespoon cornstarch – Thickens the cherry topping.
- 1 tablespoon lemon juice – Brightens the fruit flavor.
- 1/4 teaspoon almond extract (optional) – Adds a bakery-style depth.
Optional Toppings
- Chocolate chips
- Shaved dark chocolate
- Chopped almonds or walnuts
- A drizzle of chocolate ganache
Step-by-Step Instructions
Follow these steps closely for bakery-quality results:
Step 1: Prep Your Pan
Preheat your oven to 350°F (175°C). Line an 8×8-inch baking pan with parchment paper, leaving overhang for easy removal.
Step 2: Make the Brownie Base
- In a large mixing bowl, whisk together melted butter and sugar until glossy.
- Add eggs and vanilla, whisking until smooth.
- Sift in cocoa powder, flour, salt, and baking powder. Stir gently—don’t overmix.
- Pour the batter into your prepared pan and smooth the top.
Step 3: Create the Cheesecake Layer
- In a separate bowl, beat cream cheese and sugar until creamy.
- Add the egg and vanilla extract, mixing until smooth.
- Gently pour over the brownie layer and spread evenly.
Step 4: Prepare the Cherry Topping
- Combine cherries, sugar, lemon juice, and cornstarch in a small saucepan.
- Cook over medium heat for about 5–7 minutes, stirring until thickened.
- Remove from heat and stir in almond extract (if using).
- Let cool slightly, then spoon dollops over the cheesecake layer. Swirl gently with a skewer or knife.
Step 5: Bake
Bake for 35–40 minutes, or until the center is just set. A toothpick should come out with a few moist crumbs.
Step 6: Chill
Cool completely at room temperature, then refrigerate for at least 2 hours (overnight for best results).
Step 7: Slice & Serve
Use the parchment overhang to lift out the bars. Slice into squares with a sharp knife. Serve chilled or slightly cool.
Pro Tips for the Perfect Layers
- Soften your cream cheese fully—cold cream cheese creates lumps.
- Don’t skip the chill time—this sets the layers for neat slices.
- Use a hot knife for slicing—wipe clean between cuts for bakery-worthy edges.
- Avoid overbaking—the cheesecake layer should have a slight jiggle when removed.
- Drain thawed cherries well—excess liquid can make the topping runny.
Common Mistakes to Avoid
- Adding hot cherry topping directly on cheesecake can melt the layer.
- Overmixing the brownie batter creates a tough base.
- Using low-fat cream cheese compromises texture and flavor.
- Skipping parchment paper makes removal messy.
- Cutting too early causes smudging between layers.
Flavor Variations
Want to make it your own? Try these twists:
- Fresh Cherry Version – When in season, fresh cherries add a firmer texture.
- Nut-Free – Omit nuts or swap with sunflower seeds.
- Gluten-Free – Use a 1:1 gluten-free flour blend.
- Double Chocolate – Swirl in Nutella or drizzle with ganache.
- Festive Swirl – Add a hint of orange zest to the cherry layer for a holiday touch.
Serving Ideas
These bars are perfect for:
- Valentine’s Day desserts with a dollop of whipped cream.
- Bridal showers & tea parties served on a tiered stand.
- Potlucks and bake sales—easy to transport and share.
- After-dinner coffee pairing with espresso or a milkshake.
Garnish with a whole cherry, chocolate curls, or a dusting of powdered sugar for an elegant finish.
Storage & Freezing
- Refrigerate in an airtight container for up to 5 days.
- Freeze individually wrapped bars for up to 2 months. Thaw overnight in the fridge before serving.
Nutritional Information (Per Serving – 12 servings)
- Calories: ~290 kcal
- Sugar: 24 g
- Fat: 15 g
- Carbohydrates: 34 g
- Fiber: 2 g
- Protein: 4 g
Frequently Asked Questions
Can I use a boxed brownie mix?
Yes! Prepare the mix as instructed, then continue with the cheesecake and cherry layers.
Are frozen cherries better than canned?
Frozen cherries retain more texture and flavor. Canned cherry pie filling tends to be overly sweet and less fresh.
Can I make this recipe dairy-free?
Yes. Use dairy-free cream cheese and plant-based butter substitutes.
Can I double the recipe?
Yes, bake in a 9×13-inch pan and increase baking time by 5–10 minutes.
What if I don’t have almond extract?
Simply skip it, or substitute with a bit of vanilla or rum extract.
Final Thoughts
These Cherry Chocolate Brownie Cheesecake Bars combine decadence, elegance, and simplicity in one dessert. Each bite offers the richness of chocolate, the creaminess of cheesecake, and the brightness of cherries—a trifecta that never disappoints.
Whether you’re baking for a celebration or an ordinary day that calls for something extraordinary, this recipe is your answer.